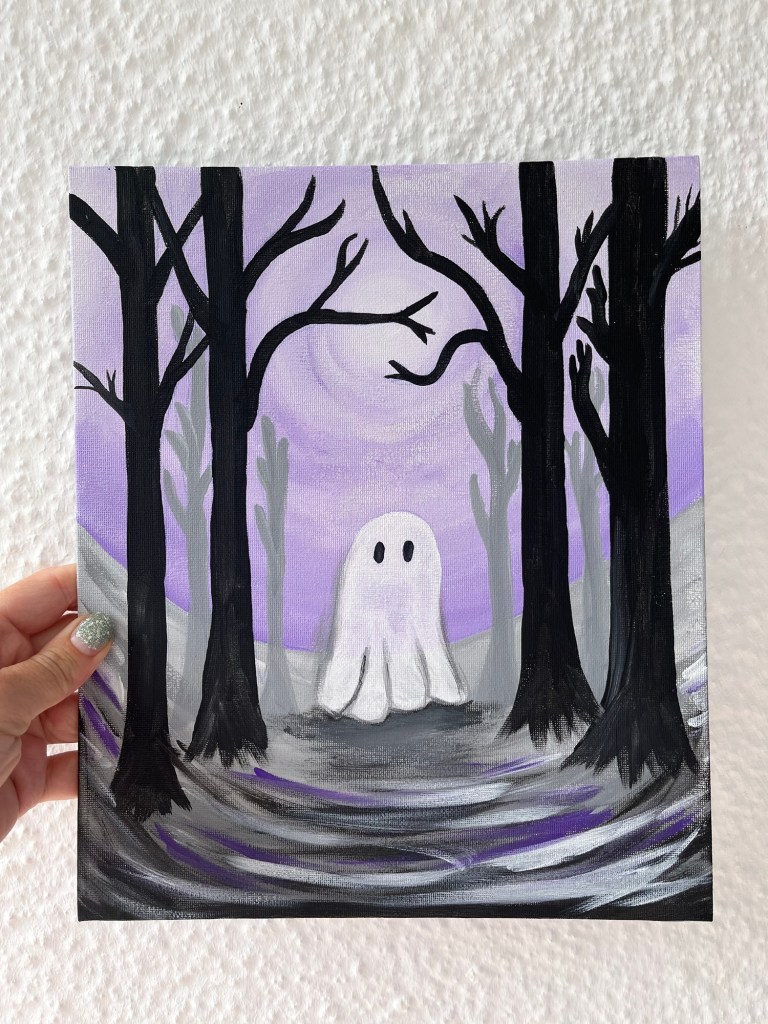
A Spooky-Cute Painting Adventure
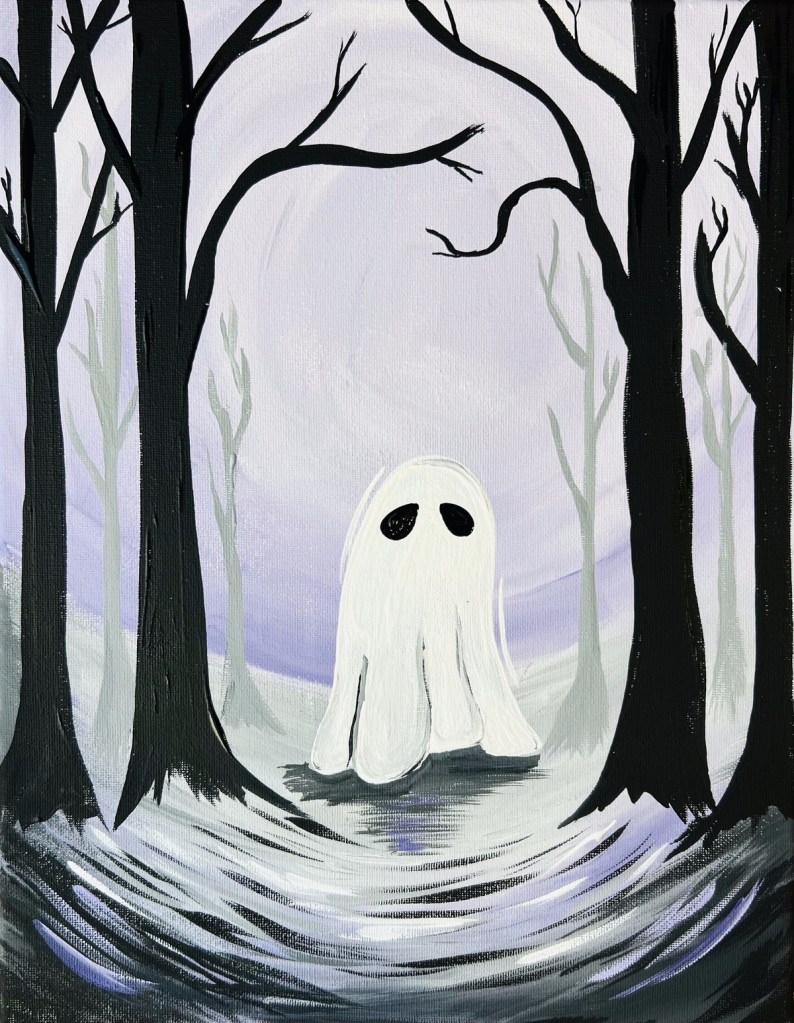
Step into the mysterious forest and paint your very own friendly ghost! This project is perfect for autumn evenings, Halloween fun, or anytime you feel like creating something a little spooky and a lot magical. Don’t worry if your brushstrokes aren’t perfect — ghosts love a bit of wobbly charm! Follow these simple steps and watch your haunted forest come to life.
I can’t wait to see your Ghost in the Forest. Post your painting and tag us @mermaidpaintclub #mermaidpaintclub
Step-by-Step Instructions
Before we dive into the steps, remember don’t stress about perfection, every painting has its own personality. Embrace those “happy accidents,” because unexpected brushstrokes can add charm and character. M
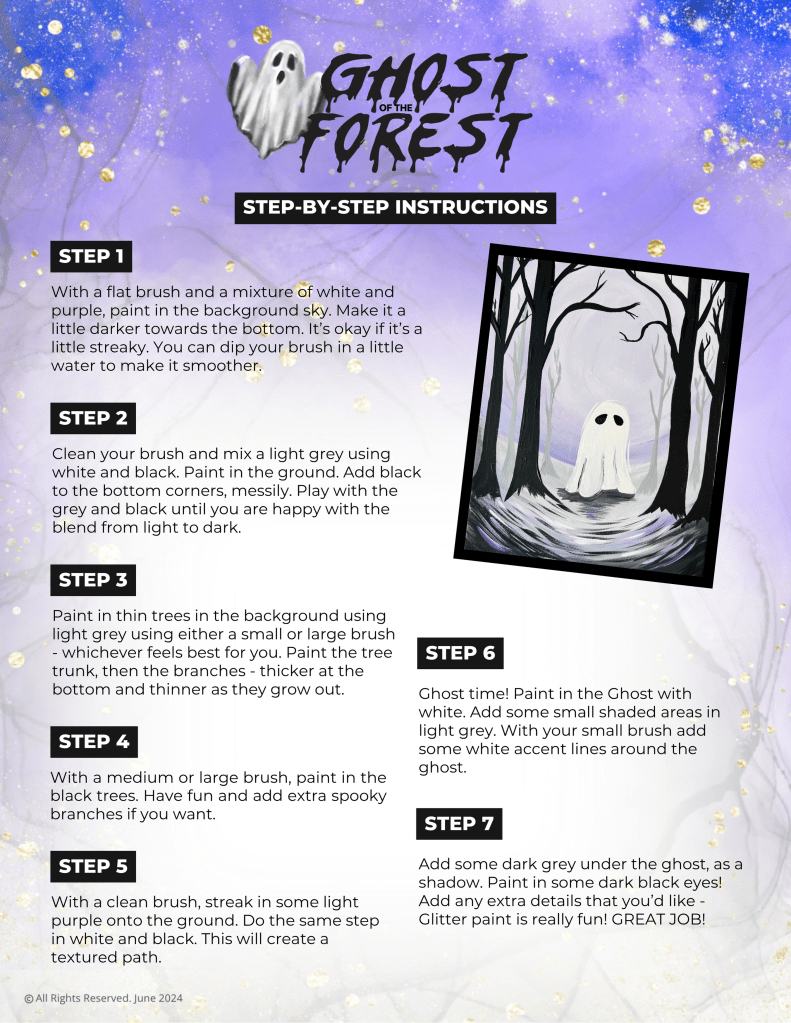
Step 1 –
With a flat brush and a mixture of white and purple, paint in the background sky. Make it a little darker towards the bottom. It’s okay if it’s a little streaky. You can dip your brush in a little water to make it smoother.
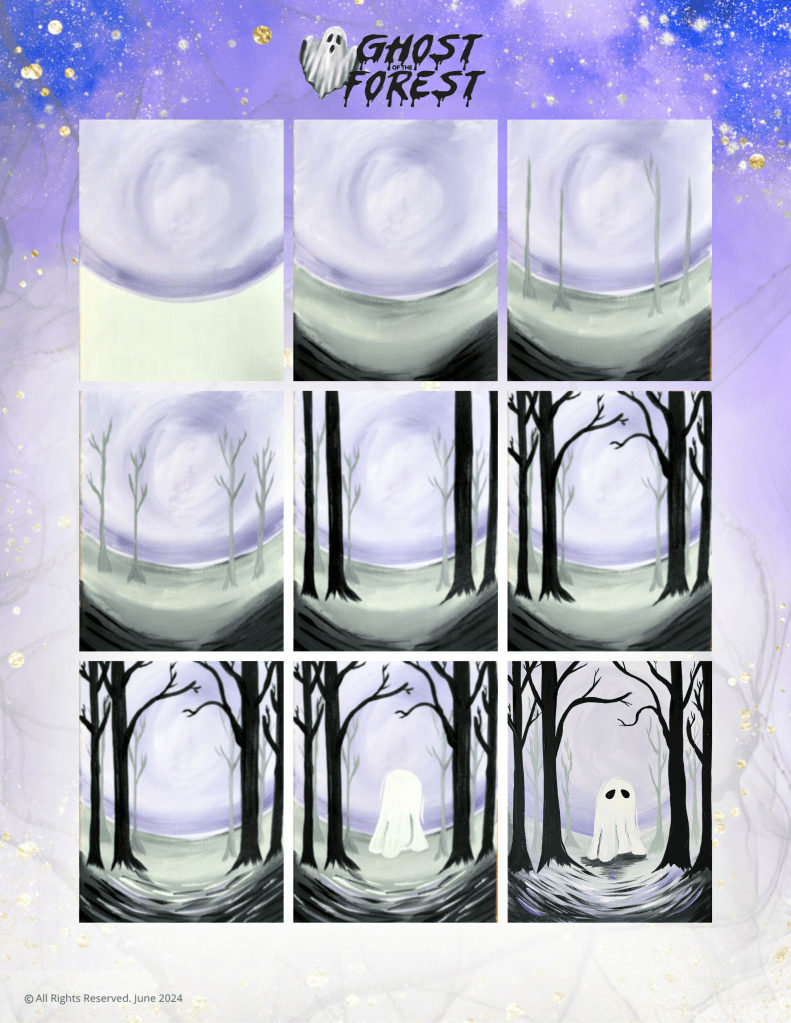
Step 2 –
Clean your brush and mix a light grey using white and black. Paint in the ground. Add black to the bottom corners, messily. Play with the grey and black until you are happy with the blend from light to dark.

Step 3 –
Paint in thin trees in the background using light grey using either a small or large brush – whichever feels best for you. Paint the tree trunk, then the branches – thicker at the bottom and thinner as they grow out.
Step 4 –
With a medium or large brush, paint in the black trees. Have fun and add extra spooky branches if you want.
Step 5 –
With a clean brush, streak in some light purple onto the ground. Do the same step in white and black. This will create a textured path.
Step 6 –
Ghost time! Paint in the Ghost with white. Add some small shaded areas in light grey. With your small brush add some white accent lines around the ghost.
Step 7 –
Add some dark grey under the ghost, as a shadow. Paint in some dark black eyes! Add any extra details that you’d like – Glitter paint is really fun! GREAT JOB!